Affiliate Disclaimer:
FishKeepingAnswers.com is reader-supported. When you buy through links on our site we may earn a commission.
Keeping tropical fish has been a popular hobby for well over 50 years. I myself have been hooked for 30 years or more. Over my time in the hobby, I have seen a massive rise in the popularity of smaller tanks.
Whereas in the past, fish keepers tended to have a single, large tank, they are now more likely to have several smaller tanks.
Paradoxically, the smaller the tank, the harder it is to keep the water conditions stable, and the more important filtration is.
When it comes to selecting a method of filtration for a small tank, there has never been more choice. In this article, I examine all the different options available for filtering a small aquarium.
Why Do Small Tanks Need Filters?
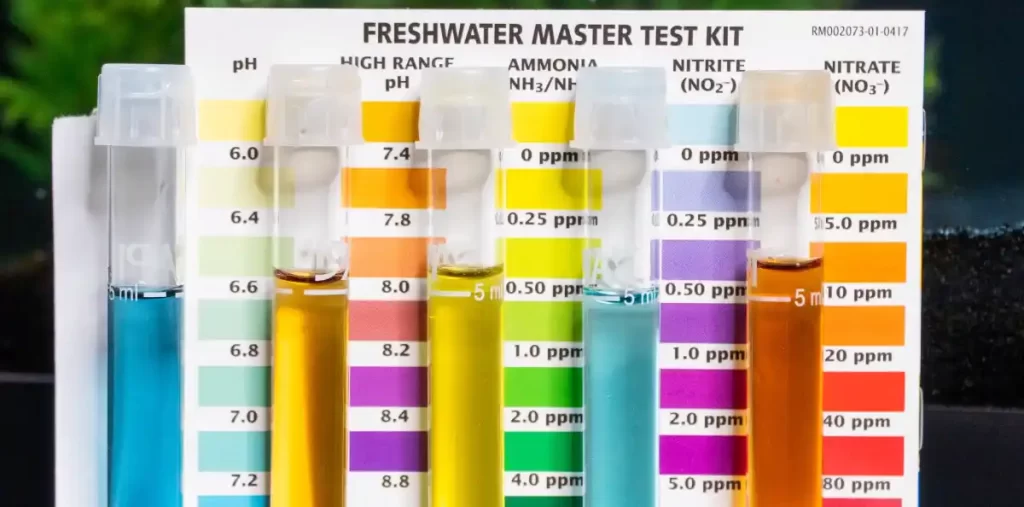
When our fish go to the bathroom, their waste is high in ammonia, and ammonia is toxic to fish. Fortunately, there are naturally occurring bacteria that live in our aquariums that convert highly toxic ammonia into a less toxic form, known as nitrite (notice the second ‘i’ in nitrite).
Although less toxic than ammonia, nitrite is still toxic to fish. Again, as luck would have it, there is a second form of bacteria living in our aquariums, and these bacteria convert nitrite into the far less harmful nitrate (that’s nitrate). This process is often referred to as the nitrogen cycle.
The image below demonstrates the nitrogen cycle.
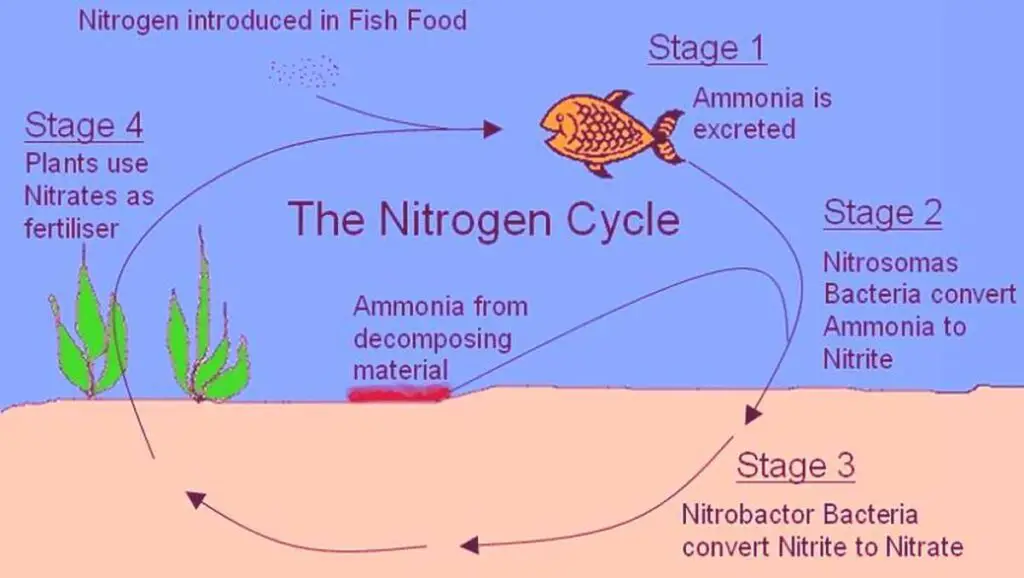
All these naturally occurring bacteria will colonize every surface within the aquarium equally. However, to get enough bacteria living in our aquariums to cope with the number of fish we keep in a relatively small space, we need to provide an optimal home for bacteria so they can reproduce in their millions to break down all the waste created when our fish go to the bathroom.
This is where aquarium filters come in.
What Types of Filtration Are There?
Before we look at the different types of filters that might be suitable for a small aquarium, let’s first look at the different types of filtration so we can better understand how each type of filter will best suit us.
There are essentially three different forms of filtration, these are;
Mechanical Filtration
Mechanical filtration relates to the physical removal of detritus from the water column. Whether it’s uneaten fish food, fish poop, or dead leaves that have broken off of the aquariums’ plants, everything needs to be removed from the water so we can enjoy our fish in all their glory.
To mechanically filter the water, a filter needs to pass as much water as possible across a media that will catch the free-floating detritus.
Depending on the type of filter being used, mechanical filtration usually requires either a sponge or filter floss to catch and hold the detritus.
Mechanical filtration is a little like having a trash can in the kitchen. It is a good place to catch and hold on to trash that we don’t want to look at, but at some point, that trash can will need emptying. The same is true of our filters. However we mechanically filter our small aquarium, the filter will need cleaning at some point to actually remove the detritus from our aquarium system.
Biological Filtration
Biological filtration requires the naturally occurring bacteria (often referred to as beneficial bacteria) mentioned above. The biological aspect of filtering our small aquariums is probably the most crucial part of the process. Whereas mechanical filtration is really just to improve our enjoyment of the aquarium, biological filtration actually helps keep the aquarium water safe for our fish, shrimps, and snails.
To achieve maximum biological filtration, we need to provide the optimum conditions for beneficial bacteria to grow. There are two things we need to provide. Firstly a suitable home for the bacteria to grow on and secondly a ready supply of aquarium water.
When it comes to providing a suitable home for beneficial bacteria we use filter media. Filter media comes in a wide range of different types, depending on the type of filter used. Typically, filter media will consist of either sponge or a highly porous media such as lava rock, ceramic rings, or one of any number of commercially available products.
The best filter media is one that provides the maximum amount of useable surface area in a relatively small space (ie inside the filter).
Chemical Filtration
Unlike mechanical and biological filtration, which are essential must-haves for all fish keepers, chemical filtration is an optional extra that some fish keepers use to give them an extra advantage when it comes to filtering a small aquarium.
Chemical filtration usually refers to any product added to the filter to carry out a specific task, such as removing tannins, ammonia, or another impurity that we don’t want in our aquarium water.
The most common form of chemical filtration is activated carbon, Activated carbon helps keep the aquarium water crystal clear and will remove chemicals or other contaminants from the water column. Some filters have space for chemical filtration, whereas others do not. Having the ability to use chemical filtration may affect your decision on which filter to use on your small aquarium.
How To Decided What Filter is Best For Your Small Aquarium?
When choosing a filter there are several things to consider. It is important to realize there is no one filter that fits all small aquariums. Just because your buddy uses X type of filter, doesn’t mean Y type of filter isn’t better for your setup.
To help you choose the right filter for your aquarium you will need to consider the following;
Turnover
Filters are rated by turnover. Turnover generally describes the amount of water that passes through a filter over a given time. The most common metric for measuring turnover is gallons per hour (GPH).
As a general rule, the higher the turn over the better, but only to a certain point. If you have a small, 5-gallon (19 liters) aquarium, and your filter turns over 200 gallons per hour, the chances are the fish are going to be blown around the aquarium before eventually dying from exhaustion.
As a general rule, you want to choose a filter that turns over your whole aquarium about 3 to 5 times per hour.
Cost
For most of us, the cost is a consideration when buying a filter. However, it is important not just to consider the cost to buy the filter, but also to run it. Some filters require you to buy the manufactures filter media.
There are a number of hang-on-back filters for example that use cartridges to hold the media, When the media needs replacing you have to buy one of the manufactures cartridges, possibly at an inflated price.
Before committing to a filter, consider how often the media will need to be replaced and what the cost to replace it will be.
Fish You Keep
The fish you keep can influence the choice of filter you go for. Some fish, like Oscars, are incredibly messy when they eat and so their aquarium will need a filter that does a good job of physically removing detritus from the water column.
Other fish, like common goldfish, like to dig in the substrate. As such, an undergravel filter that sits under the substrate may not be a good choice for that aquarium.
What Types of Filter Are Available For Small Tanks?
There are many different types of filters available for filtering a small tank. Some of the factors that may dictate which filter you choose include the price to purchase the filter, the cost to run the filter, how easy the filter is to clean, and how much it costs to replace the media within the filter.
The main types of filters on the market that are suitable for small tanks are;
Each of these different filters has its pros and cons.
Sponge Filters
Sponge filters are some of the simplest types of filters on the market. Sponge filters work by sending air bubbles down a piece of airline tubing into the filter. The air bubbles then rise up the tube sticking out the top of the sponge filter. As the bubbles rise up the tube they draw water from inside the sponge filter with them. The water inside the sponge is then replaced by the water surrounding the sponge filter.
This continuous action leads to large quantities of aquarium water being drawn through the sponge filter, providing both mechanical filtration and biological filtration in the process. Sponge filters are a cheap and efficient way to filter a small aquarium.
Using a sponge filter is one of the most cost-effective ways to filter an aquarium and they are used by many professional breeders who have lots of tanks to filter. In my own fish room, I have close to 100 aquariums and many of them are filtered using sponge filters.
Typically, sponge filters come in two different designs. They are either a large, round piece of sponge with the uplift tube running through the core, or they are two smaller sponges located on either side of the uplift tube. Either design can work just as effectively.
For sponge filters to work they do need a separate air pump. It is the air pump that provides the bubbles to run the sponge filter.
One of the major advantages of sponge filters is they last for many, many years. Typically there are very few things that can go wrong with a sponge filter. There are no moving parts, and as long as the air pump is running, the filter is running.
Sponge filters are also relatively easy to service. There are no components to replace, so servicing just means cleaning.
The easiest way to clean a sponge filter is to fill a bucket with aquarium water, then remove the sponge filter from the aquarium and squeeze it several times in the bucket of water. Discard the water and repeat as required. Normally I have to use three or four buckets of water when I clean my sponge filters, but I just do it as part of my regular water change schedule.
Once cleaned the airline can be reattached and the sponge filter returned to the aquarium. For most small aquariums I would imagine the sponge filter will only need cleaning about once every 3 to 6 months.
In my opinion, the main downside to using a sponge filter is they don’t look visually appealing. They are pretty hard to hide, especially in a small tank. However, with a couple of well-placed plants or a large decoration, a sponge filter can usually be tucked away, if not actually hidden.
Sponge filters offer good mechanical filtration and very good biological filtration, however, there is no simple way to add any chemical filtration when using a sponge filter. Sponge filters are also not very customizable, meaning unlike a hang-on-back or canister filter, you can’t really adapt the media you use to meet your particular system.
The upsides to using a sponge filter:
The downsides of using a sponge filter:
My final thoughts on sponge filters:
I am a huge fan of sponge filters. I have dozens of them running in my fish room. In my experience, sponge filters are a great way to filter small aquariums.
Most sponge filters are very similar. There are no real benefits to choosing one brand over another. However, if I were looking to buy a new sponge filter today I would check out the ones made by Aquarium Co-op. Their sponge filters have been developed to offer maximum filtration, and they start from less than $6 for the nano-size sponge filter. You can find out more about these sponge filters on the Aquarium Co-op website.
Box Filter
Box filters are used far more in East Asian countries than they are in the US. In countries like Japan, fish keepers use box filters all the time, and with good reason. Box filters give the adaptability of canister filters in a filter the size of a sponge filter.
Box filters work in a very similar way to sponge filters. Air travels down an airline into the center of the box filter before traveling up an uplift tube. As the bubbles travel up the uplift tube they carry water with them, which in return causes water from the aquarium to be drawn into the box filter and through the filter media.
In most of the box filters that I have used, the water enters the box filter at the top before being drawn down through the filter to the bottom of the box before traveling up the uplift tube.
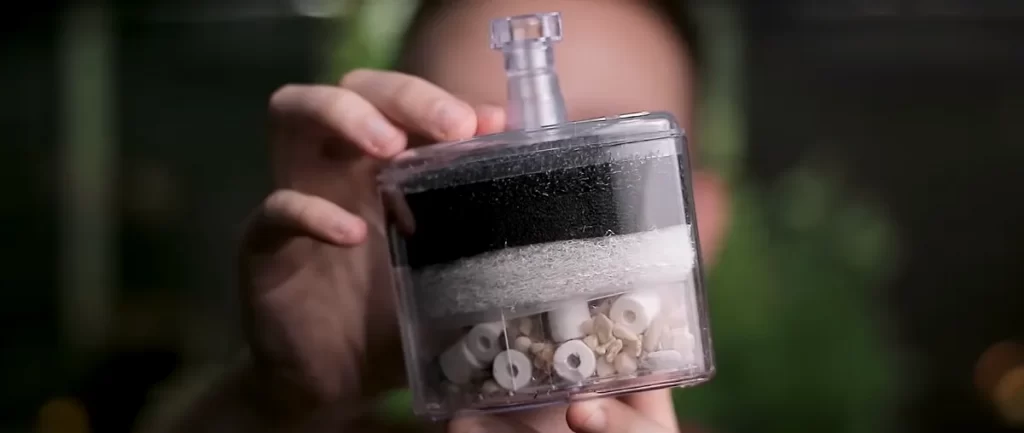
A box filter allows the aquarists to select the best filter media for the individual aquarium. In my own box filters, I tend to start with a sponge layer, which provides mechanical filtration. Under the sponge, I often have a layer of ceramic media, normally ceramic rings, or ceramic tubes. This highly porous media provides the perfect breeding ground for beneficial bacteria which provides me with biological filtration.
One major advantage box filters have over sponge filters is the ability to add a layer of chemical filtration.
Much like sponge filters, box filters have no moving parts, which essentially means they can last for years before they need replacing.
Box filters are very easy to service, and as the box itself is usually made of clear plastic, you can see when the filter is clogged up and needs cleaning.
To service a box filter, disconnect the airline and remove the filter from the aquarium. The sponge can be removed from the filter and squeezed out in a bucket of aquarium water. This process may need repeating 4 or 5 times before the sponge is clean. The ceramic media can also be washed out in a bucket of aquarium water, although the ceramic media shouldn’t require much washing. Any chemical media like activated carbon should be replaced when the box filter is serviced.
In my experience, the main downside box filters have is they take up a fair amount of real estate inside the aquarium, which is especially a problem in a small tank.
Box filters offer excellent filtration at a relatively low cost. Although they require a separate air pump to provide the water movement, box filters cost less than $10 plus the media. From memory, my last box filter cost me $9 and I spent about $15 on media. Luckily I already had an air pump, but if you needed an air pump too, they start at around $12.
The upsides of using a box filter:
The downsides of using a box filter:
My final thoughts on box filters
I am a huge fan of box filters. These small filters offer us the flexibility of much larger filters, but with the low purchase and running cost of a sponge filter.
Box filters are the smallest filters that offer us the chance to add chemical filtration, meaning activated carbon can be used to ensure the aquarium water is crystal clear. It surprises me more fish keepers do not use box filters.
Undergravel Filter
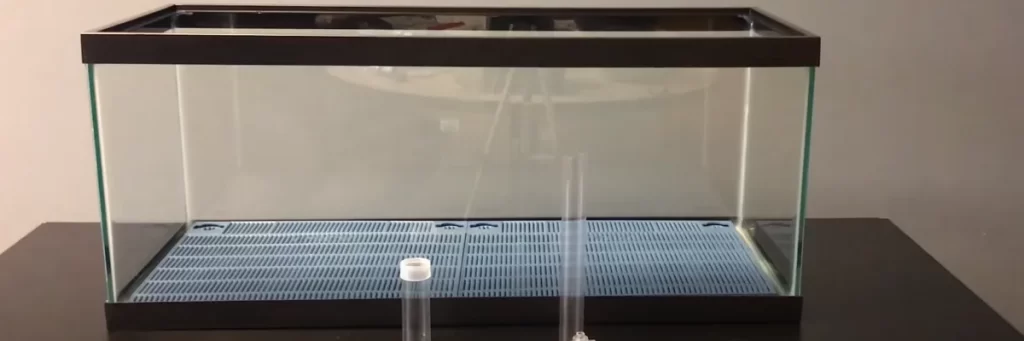
When I first started fish-keeping, undergravel filters were all the rage. Sponge filters were never seen in the hobby, and canister filters were very expensive at the time, so everyone just used undergravel filters. Sadly, these filters have fallen out of popularity in recent years. For some reason, undergravel filters are now seen as a poor man’s filter.
Much like sponge filters, undergravel filters work by sending air down an uplift tube. As the air rises from the bottom of the uplift tube it draws water with it. Unlike a sponge filter, the water is then drawn down through the substrate (typically gravel).
Undergravel filters can also work with a powerhead rather than air bubbles. Either way, the filtration is more or less the same.
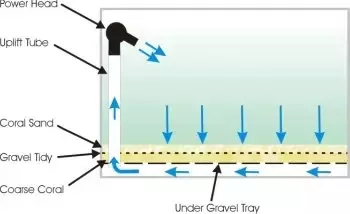
One of the real benefits of using undergravel filtration is the whole floor of the aquarium becomes a filter, meaning if one area becomes blocked, another area of the floor becomes the filter. This makes undergravel filters very efficient and they rarely become blocked.
Undergravel filters are cheap to set up and cheap to run. Although they do need an additional air pump to provide the bubbles, typically a single air pump can run multiple undergravel filters. This makes using several undergravel filters efficient to run, costing just a few cents a day to run the air pump.
Servicing an undergravel filter is also really very simple. All you need do is vacuum the gravel when you carry out a water change. Gravel vacuums work by drawing up a small amount of gravel into a wide pipe and tumbling it to release all the detritus caught in it. The dirty water heads off down a tube to the drain whilst the clean gravel drops back down to the bottom of the aquarium.
In my experience of using undergravel filters, they normally only need the gravel to be vacuumed about once every six months, although I have no doubt you could go longer without issues.
There are drawbacks to using undergravel filters. I have found the primary one being fish that dig. If you have fish that like to dig, such as common goldfish or members of the Geophagus family, they will typically dig in one area, and they can often expose a single piece of the undergravel filter plate that sits below the gravel.
If this happens, water will be drawn through this area more easily than the rest of the gravel, creating a shortcut and allowing the water to go down the hole and up the uplift pipe without being effectively filtered by the gravel.
The upsides of using undergravel filters:
The downsides of using undergravel filters:
My final thoughts on undergravel filters
To my mind, it is a shame that undergravel filters are not as popular as they once were. Sadly there are very few manufacturers making these filters anymore, meaning there are few models on the market to choose from.
If I were looking for a small, undergravel filter today, I think the best bet would be one of the modular ones that snap together to fit any size tank.
Internal Power Filter
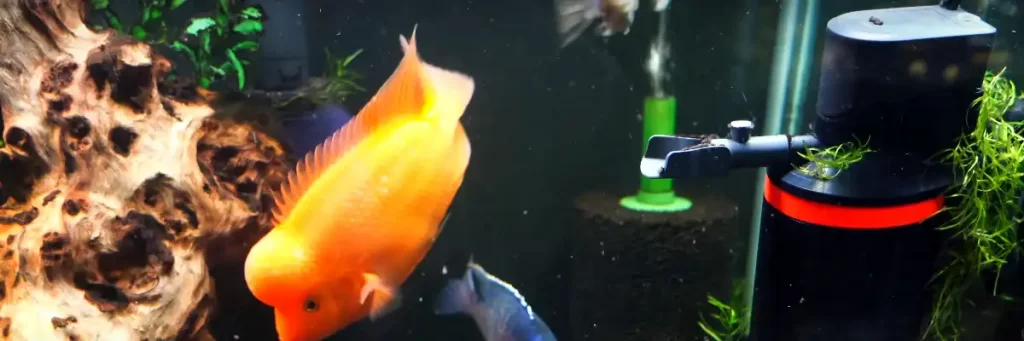
Internal power filters are the first type of filter on my list that does not use air as a means of creating water movement. Internal power filters (sometimes referred to as internal canister filters) typically use a small impeller to move water through the filter.
Most internal power filters have a chamber that is filled with media, normally sponge. On top of this chamber will be a powerhead that contains an impeller. When the power is turned on, the impeller turns rapidly, pushing water out of the media chamber. As this happens, freshwater is drawn into the filter chamber and through the filter media before being pushed back into the tank again.
Internal power filters are an excellent way to filter small aquariums. I myself have several tanks that use them. I have found the Fluval ‘U’ Series internal power filters to be very good.
The majority of internal power filters come with a single media chamber, although there are one or two that have multiple media chambers. As standard, these filters come with a sponge as the primary filter media. A sponge is very good at both mechanical and biological filtration.
However, it is often possible to add another type of media to an internal power filter. Some fish keepers use this to their advantage, adding activated carbon to the filter, helping create clearer water. This does depend on the size of the internal power filter. A very small power filter will have a very small media chamber, reducing the chances of being able to play around with the media.
I have found internal power filters to be an efficient way to filter my smaller aquariums. Because these filters do not use air to run, and therefore do not have air bubbles popping on the surface continually, they tend to be very quiet. In fact, often you wouldn’t actually know an internal power filter was running.
Internal power filters are usually fairly simple to service. When they become clogged, or the flow noticeably drops, suggesting the media needs cleaning, you simply remove the media chamber and wash the media in a bucket of tank water.
Sponges can just be rung out like with a sponge filter, and any other media can just be thoroughly rinsed using tank water removed from the main aquarium.
There aren’t too many drawbacks to using internal power filters, especially for smaller tanks. Typically these filters are fairly cheap to buy and cheap to run. Internal power filters can be purchased for less than $15 and they don’t cost very much to run each month.
Upsides of using internal power filters:
Downsides of using internal power filters:
My final thoughts on internal power filters
Internal power filters are an excellent way to filter a smaller aquarium, providing the right size filter is selected. Internal power filters are typically quiet making them suitable even for fish tanks in the bedroom.
For those who are more adventurous, the media in an internal power filter can be changed to suit an individual aquarium’s needs (often referred to as hot-rodding).
I have had good luck using several different internal power filters. If I were buying one today I would go for either an Aqueon QuietFlow or a Fluval ‘U’ Series filter.
Hang-on-back Filter
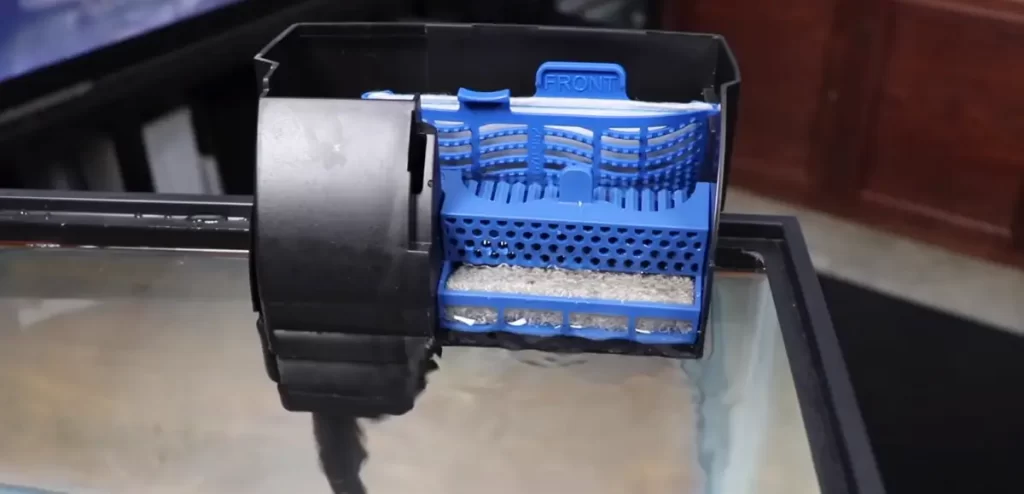
If there is one area of filtration that has seen real innovation over the last 10 to 15 years, its hang-on-back filters (which are sometimes referred to as HOB filters).
As the name suggests, hang-on-back filters do exactly that, they hang on the back of the tank. These filters use a pump to draw water into the filter, passing it through between 1 and 4 chambers, depending on the model, before returning it to the aquarium. Hang-on-back filters offer the opportunity to really fine-tune the media used in the filter.
Most hang-on-back filters start by passing the water through a chamber filled with a sponge. This sponge offers both mechanical and biological filtration. Most of the dirt and debris pulled into the hang-on-back filter will be held in this sponge.
It is then typical for the water to pass through another form of media to provide further biological filtration. In many hang-on-back filters, this will be ceramic media like ceramic rings or ceramic blocks. Ceramic media is typically very porous, offering a large surface area relative to its volume. Having this additional filter media helps efficiently convert any ammonia in the aquarium water to the relatively safe nitrate.
Many hang-on-back filters then pass the water through a third area which often has activated carbon, ensuring the water in the aquarium remains crystal clear and free from unwanted impurities.
For the more experienced aquarists, hang-on-back filters off their first chance to actually play with the available media and change the way their filter works to suit their individual tanks’ needs.
In my own fish room, I don’t use as many hang-on-back filters as I could simply due to the way I run my fish room. Space is at a premium, and as hang-on-back filters naturally sit outside the aquarium, they do take up real estate. If you only own one or two aquariums, this is rarely a problem.
All of the other types of filters looked at so far sit inside the aquarium, making the risk of flooding your room due to filter malfunction almost zero. Hang-on-back filters on the other hand sit outside the aquarium. To work, hang-on-back filters have to draw water out of the aquarium before passing it through the media and returning it back to the tank.
As such, there is a chance that a hang-on-back filter becomes blocked and ends up pumping water all over your floor.
Although this risk is low, it is one that should be considered when choosing a type of filter for a small aquarium. If a sponge filter or an internal power filter is not serviced, the worst that can happen is it stops passing water through the filter. With a hang-on-back the worst that can happen is it damages your floor.
It is extremely important that hang-on-back filters are serviced on a regular basis, or at least inspected on a regular basis to ensure they are working correctly.
There is one major hack everyone can do with their hang-on-back filter that will increase its efficiency and reduce the chances of the filter blocking up and overflowing, and that is to add an intake sponge to the intake of the filter. An intake sponge will prevent larger pieces of debris from being drawn into the hang-on-back filter and provide additional biological filtration to the filter.
Hang-on-back filters typically cost between about $20 and $100 depending on the brand and power of the filter.
Upsides of using a hang-on-back filter:
Downsides of using a hang-on-back filter:
My final thoughts on hang-on-back filters
In my experience, hang-on-back filters are an excellent way to filter a small aquarium. Prices vary widely, meaning there is probably a hang-on-back filter to suit every budget.
If I were to look at buying a hang-on-back filter today I would almost certainly consider either an AquaClear hang-on-back filter or I would look at the Fluval ‘C’ Series of filters.
Canister Filter
Many see canister filters as the gold standard of filtration. Whilst it is true that canister filters probably offer the best filtration for very large aquariums. However, when it comes to filtering a smaller tank, canister filters may be a little overkill.
Canister filters sit outside the aquarium, usually below the level of the tank. They work by drawing water from the main aquarium, using a siphon. The water is passed through the canister filter which typically contains baskets filled with various types of media.
In many cases, one or more baskets will be filled with foam, with the other baskets having various porous media or chemical media such as activated carbon.
Once the water has passed through all the baskets it is returned to the aquarium by a spinning impeller. Finally, the water passes through either a spray bar or a return pipe that agitates the water surface.
Canister filters have numerous advantages, although they are often too powerful to use on very small fish tanks.
Servicing a canister filter can be a little more time-consuming than the other filters I have detailed in this article, although they often do not need servicing as often as the other filters.
One very real disadvantage of using a canister filter is the risk of flooding the room. Much like hang-on-back filters, canister filters physically remove the water from the aquarium before filtering and returning it. If during the maintenance process a seal was not seated properly, or a hose becomes disconnected, the entire aquarium water may siphon out of the aquarium onto the floor.
One further advantage of using a canister filter offers is additional equipment can be added outside the aquarium, such as a UV sterilizer.
Canister filters can be expensive to purchase. Typically they range from around $100 to $400+ depending on the make and model.
Upsides of using a canister filter:
Downsides of using a canister filter:
In Conclusion
There are many different filters available for filtering a small aquarium. Choosing the right filter will depend on many factors, including cost, space, and aquarium stocking.
To my mind, many aquarists get carried away buying filters that are expensive and too powerful for their aquarium. I filter dozens of aquariums in my fish room using a sponge filter attached to an air pump. It is a winning combination that is cheap to buy and cheap to run.